Title: A Feather for your Belt
Circuit Board: Adafruit Feather M0 with ATWINC1500 or similar, Featherwings
Material: 3D printed plastics: PLA, TPU, PLA+Wood
Fabrication Method: 3D printing
Method of wearing: Attached to a belt
Description:
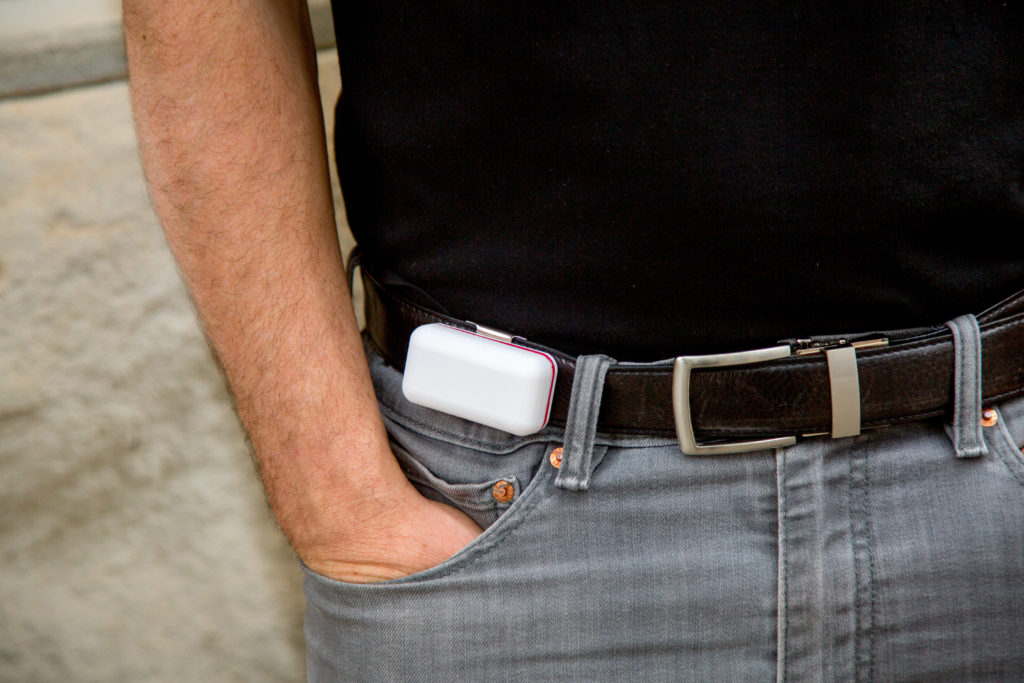
The Feather Belt is a modular system for easily attaching computation to an outfit. It offers a protected enclosure for some of the usual parts such as a battery and Featherwing, and is easily attached and removed to almost any outfit without the need for tools.
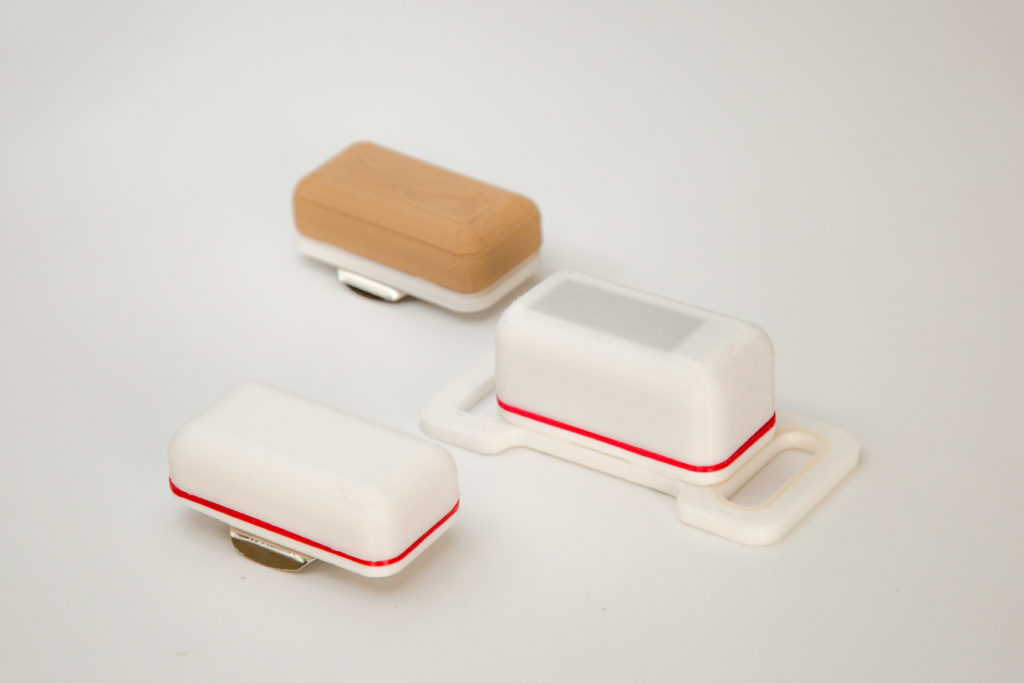
The interchangeable parts offer flexibility for different uses. The Feather can be used with two sizes of battery, with or without stacking headers, and with or without a Featherwing. Different ornamental covers are optional.


CAD files (Autodesk Fusion 360) can be found at the following link: https://a360.co/2HPvTdr
Wearability (including initial goals and final results – what was/wasn’t addressed):
The goal of this design work was to explore a compact, general purpose enclosure for the Feather and Featherwing system. A belt represented a common article of clothing where an enclosure of this sort would not seem out of place.
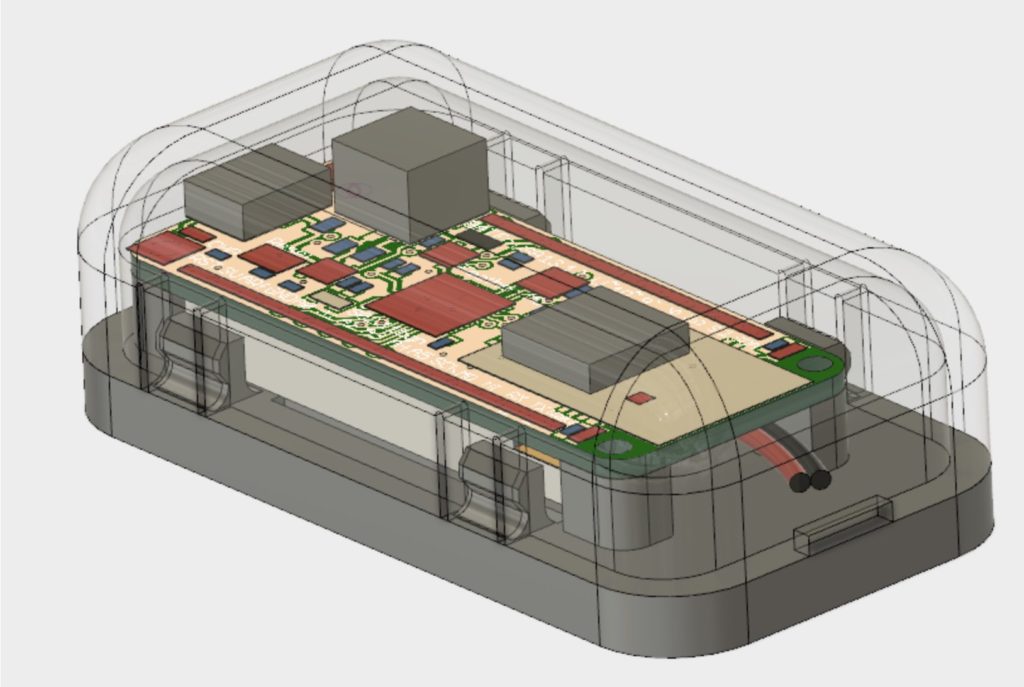
We focused on a rigid enclosure with some environmental protection, in a self-contained package. We did not wire the Feather to components mounted on other parts of the body, permanently integrate this piece with the clothing.
The final design provides a good degree of flexibility for various applications and its modularity suggests ways of adapting its components for specific applications.
Using a rigid box-like enclosure for a microcontroller is not always ideal for wearability. These sorts of enclosures can be uncomfortable and conspicuous. To mitigate these factors we tried to minimize the size of the enclosure, provide rounded corners, offer different attachment options and ornamental designs.
Findings:
This design can be made entirely from PLA, the most common and easiest-to-use material for FDM 3D printing. There is some advantage to using other materials for some of the parts to improve aesthetic and functional aspects.
Making use of 3D printing for fabrication means the CAD files can be modified to accommodate specific applications. It also drove the design approach and limits some of the design choices. Notably, the belt clip is sourced from a steel part, rather than being made of plastic. An early design that used a snap-together enclosure was abandoned because we couldn’t get sufficient reliability from any of the 3D printed materials we tried (PLA, APLA, PETG, Polymaker Polysmooth), despite various geometries.
We found that it was possible to incorporate a lot of small features to the 3D printed parts, provided the features mostly were larger than 1mm. Clearances and fits were generous, leaving at least 0.005” or 0.125mm clearance for mating parts.
Using 3D printing made it easy to use an iterative approach that involved printing, assembling and using prototypes at each stage was helpful for identifying wearability, assembly and strength issues early.
Process Documentation:

This early design sketch (Fig 2) shows a Feather attached to a minimal belt clip made of a single 3D printed part. This basic design used the Feather itself to add rigidity, and held the battery on top. A version with a cover is shown on the left (side) view. The belt clip integrated strain relief for wires soldered directly to the Feather.
Discussing this, we agreed that a cover was worthwhile, and on reflection decided that the Feather should be protected from mechanical strain, rather than being structural.
This version had the wires on the bottom and the battery on the top. Reversing this arrangement seemed like a better choice for protecting both battery and wires.

This version (previous two images) showed promise but had a few shortcomings. The belt clip could come loose and rotate. It was a bit hard to clip to a belt because the inside of the clip was not recessed and could catch on an edge.
The snap fit depended on the cover having flexible tabs. These were a bit weak and one broke off right away. Their construction also left small holes in the sides which reduced environmental protection. The next version addressed these issues.

Version 3 (above) reduced the overall height slightly, and added a shadow gap to the join between cover and base for cosmetic reasons. The flexible tabs were longer than in v2. There is also a pocket on the back which helps keep the screw-on belt clip from rotating .
This version worked better, but the tabs kept breaking. Partly this is because there were no other alignment features to take the load when grabbing the assembly by the cover and attaching it to a belt.
Also, printing the base with its large flat surface on the build plate meant that it the tabs were susceptible to breaking between print layers. Being quite small features, they did not always print very well, with small voids creating weak points. Despite attempts in PLA, APLA and PETG, the snap fit didn’t seem to be a robust approach.


Both compact and tall (Featherwing) versions of version 4 were produced. This version screwed together from the back, and included a 3D printed TPU gasket for water resistance made of Ninjaflex Semi-flex. Screwing the cover on compresses the gasket 0.01” (0.25mm).